Needle Tip by Mary Forte
Question: What would be a good yarn or thread for provisional cast ons and lifelines? I need something thin and smooth that will pull free easily from knitted fabric.
Answer: I recommend using ravel cord.
What’s Ravel Cord?
Thin gauge silk thread and crochet cotton are easily obtained and typically inexpensive choices for temporary applications, such as provisional cast ons and lifelines, but the machine knitting world uses a super useful option called ravel cord. Usually made of braided nylon or rayon, it’s slippery but not stretchy. The plies don’t split or unwind, and it has no stray fibers that catch when you are trying to pull out a provisional cast on or lifeline.
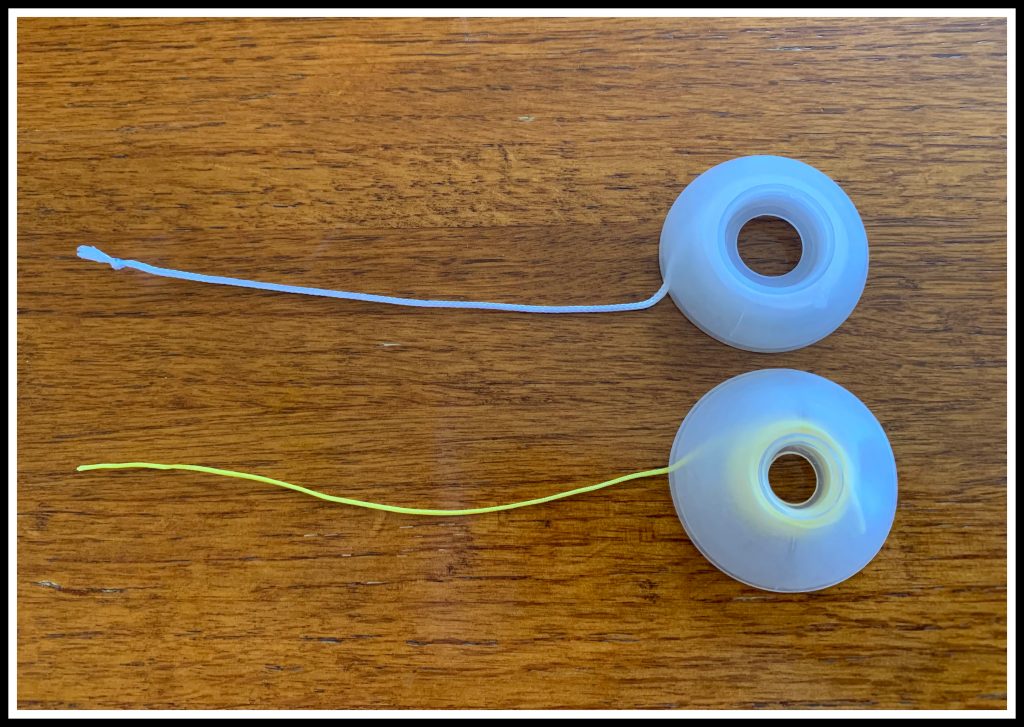
Another advantage is that ravel cord is sturdy and reusable. Since it doesn’t split, it won’t get into situations that require cutting it out of the work. It comes in a variety of colors to make it easier to see in the fabric. It also comes in several thicknesses to pair with thicker or thinner yarn. Do an Internet search for “ravel cord,” and plenty of options will come up.
How Do I Use Ravel Cord?
There are several ways to use ravel cord.
Provisional Cast On With Waste Yarn
Here’s a quick and easy technique for creating a provisional cast on.
Step One: Start with some waste yarn and do a quick “whatever” cast on with the project needles. You don’t need to be concerned with the evenness of the stitches at this point, so it’s okay if the cast on is fast and sloppy. E-loop, long-tail, and knitted-on cast ons are all good choices.
Step Two: Continuing with the waste yarn, knit a few rows of stockinette, ending with a knit row. Drop the waste yarn.
Step Three: Purl a row with the ravel cord.
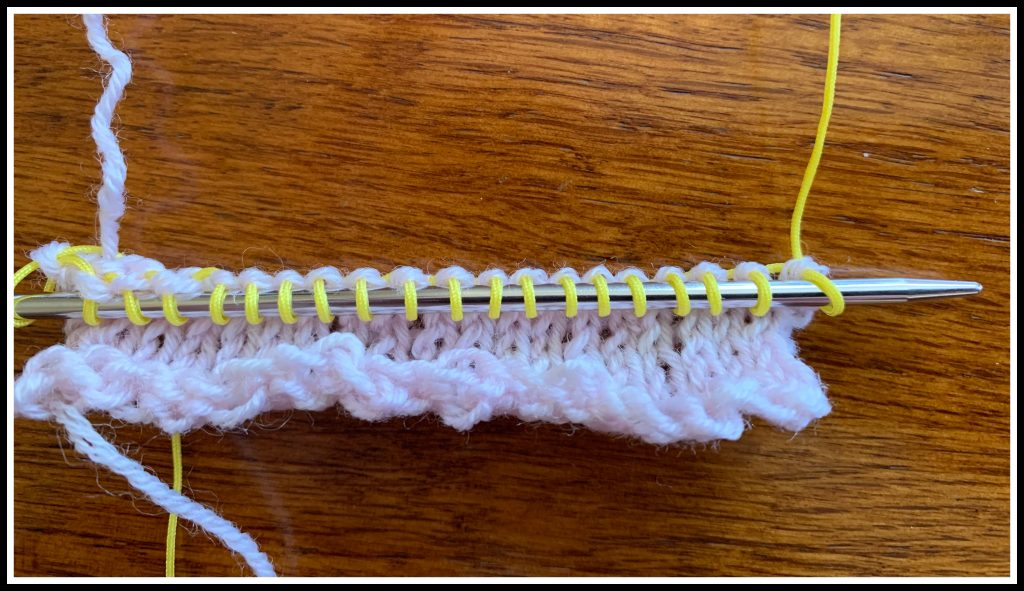
Step Four: Change to your project yarn and knit the first row. That first row is the provisional stitches that you will release when you need them. Continue with the project yarn from here.
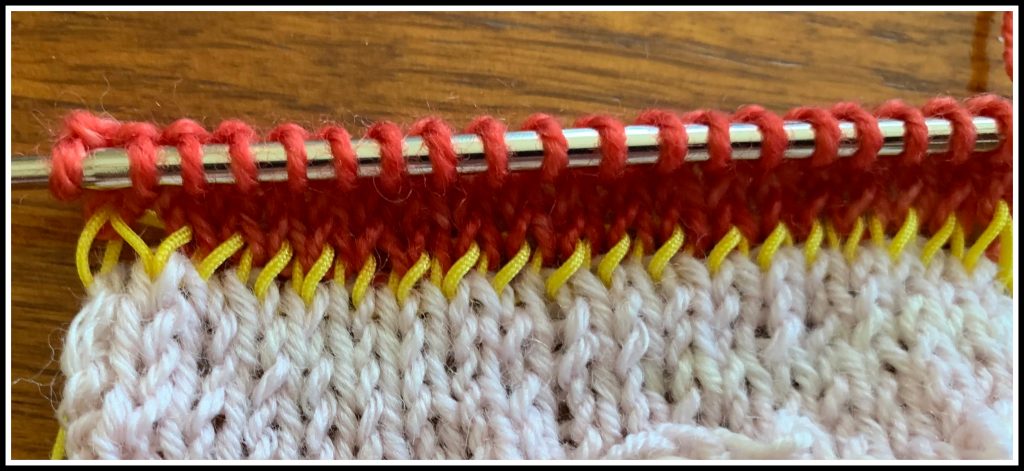
Step Five: When it’s time to put the provisional cast on back on a needle, you will run the needle through the loops above the ravel cord—the first row of the project yarn. Be sure to always run the needle through the same leg of each stitch—either all right legs or all left legs. If you pick up both legs of a stitch, it will not be secured when you release the ravel cord.
To make the process a little easier, I recommend using a circular needle so that it doesn’t matter which end you start with.
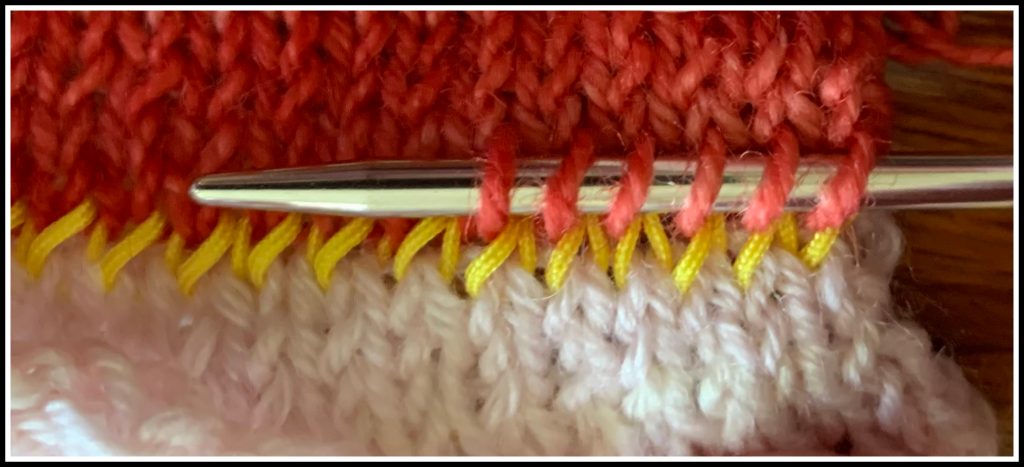
Note that you will encounter a half-stitch at each end of the row. When you release the cord, those half stitches will not stay on the needle, but you can cast on one e-loop stitch with the project tail to get back to the original number of cast-on stitches.
Step Six: Once all of the stitches are back on a needle, pull out the ravel cord. You may be able to pull out the ravel cord with one strong tug, but it’s more likely you will need to pick the stitches out one-by-one with the tip of a knitting needle or tapestry needle. Alternatively, you can put each stitch back on the needle as you pick the ravel cord from the work.
Provisional Cast On With a Crochet Chain
Provisional cast ons can also begin with a crochet chain that will later be removed. Ravel cord is a great choice for a crochet chain since it is so easy to undo. Here’s how:
Step One: With a crochet hook a least one size larger than your project needles, make a simple, loose crochet chain with the ravel cord. If needed, see the Crochet.com “Chain Tutorial” on YouTube. For a little extra insurance, I always make a few more chains than I think I need.
Step Two: Pull the tail of the ravel cord loosely through the last stitch of the chain and mark it in some way so that you remember which is the end. Tying a knot or leaving a bobbin or yarn butterfly attached are easy options. For yarn butterfly directions, see my Spring 2019 Needle Tip.
Step Three: With the project yarn and needle, pick up stitches out of the back bumps of the chain for a provisional cast on. The trickiest part of picking up the back bumps is figuring out which are the back bumps. The flat side of the chain looks a series of nested Vs, like this:
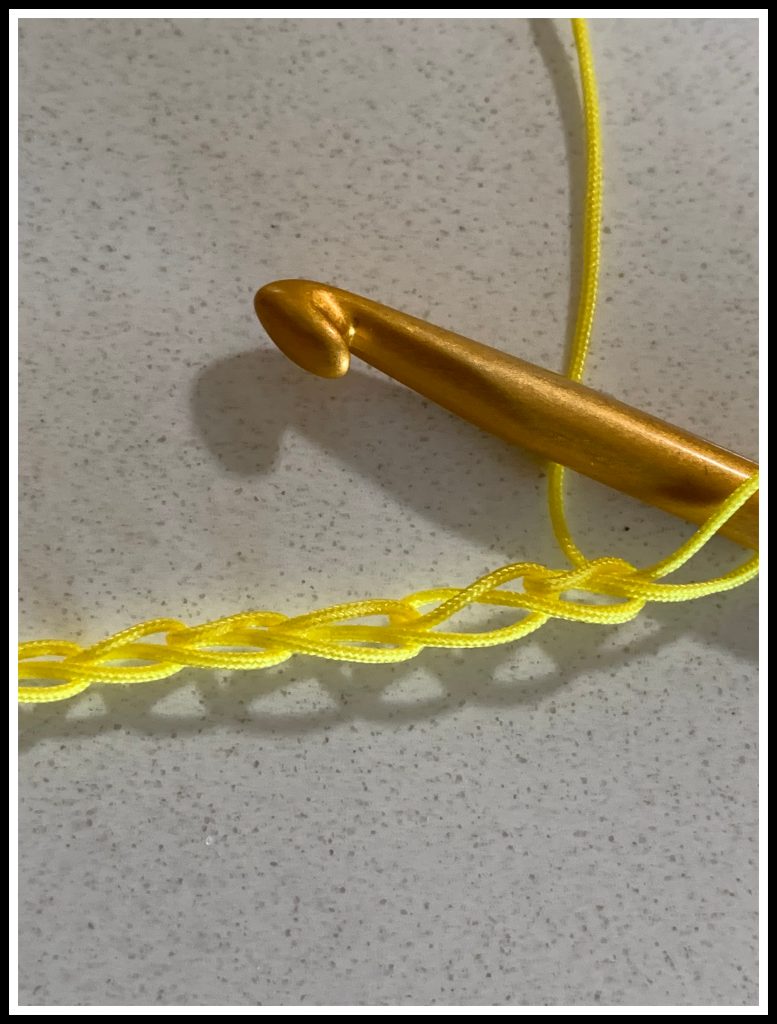
Don’t pick up either of the strands of the Vs. If you pick up one of these strands, it will take longer to remove the ravel cord.
The bumpy side is directly behind the Vs and looks like this (bumps are marked):
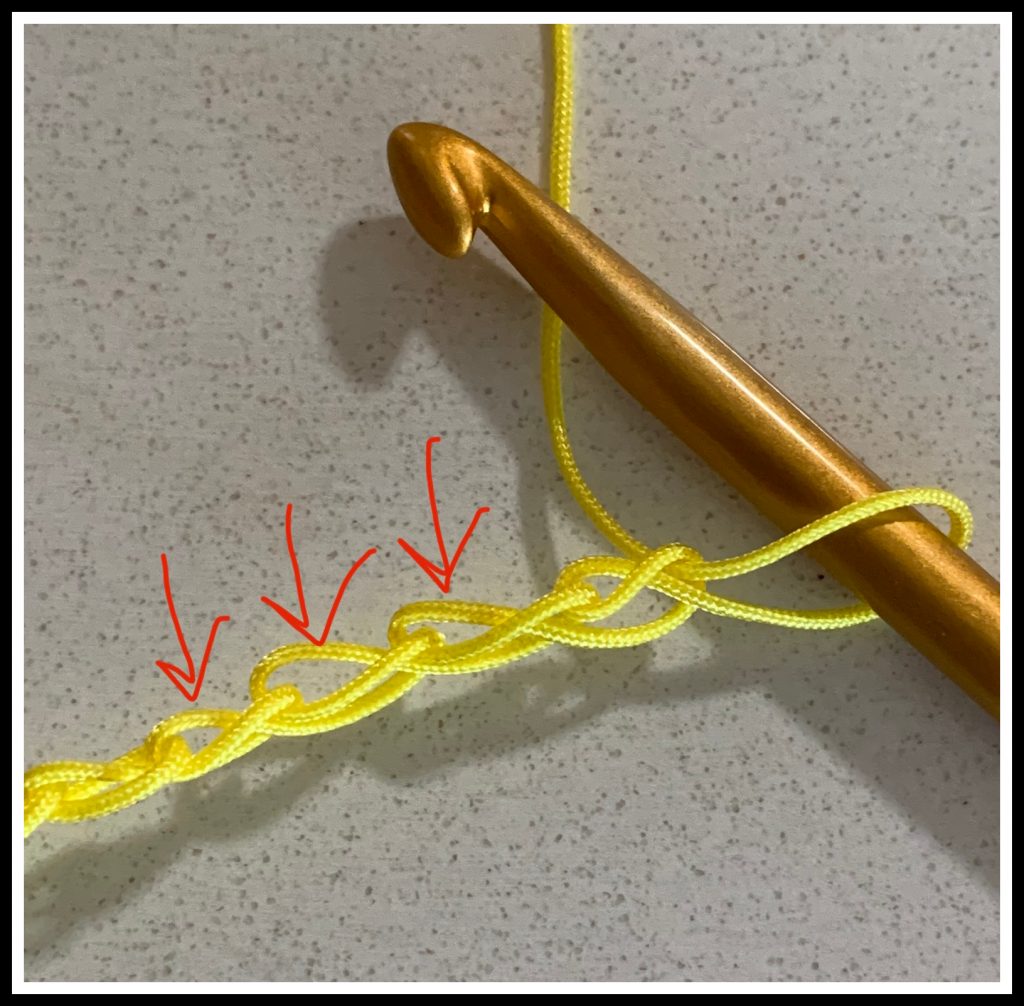
Pick up stitches out of these back bumps by inserting the needle, front to back, under the bump, wrapping the yarn as if to knit, and pulling a loop through to the front—much like picking up stitches along a selvedge. If you are picking up in the correct place, you will see the “V” at the bottom of the chain.
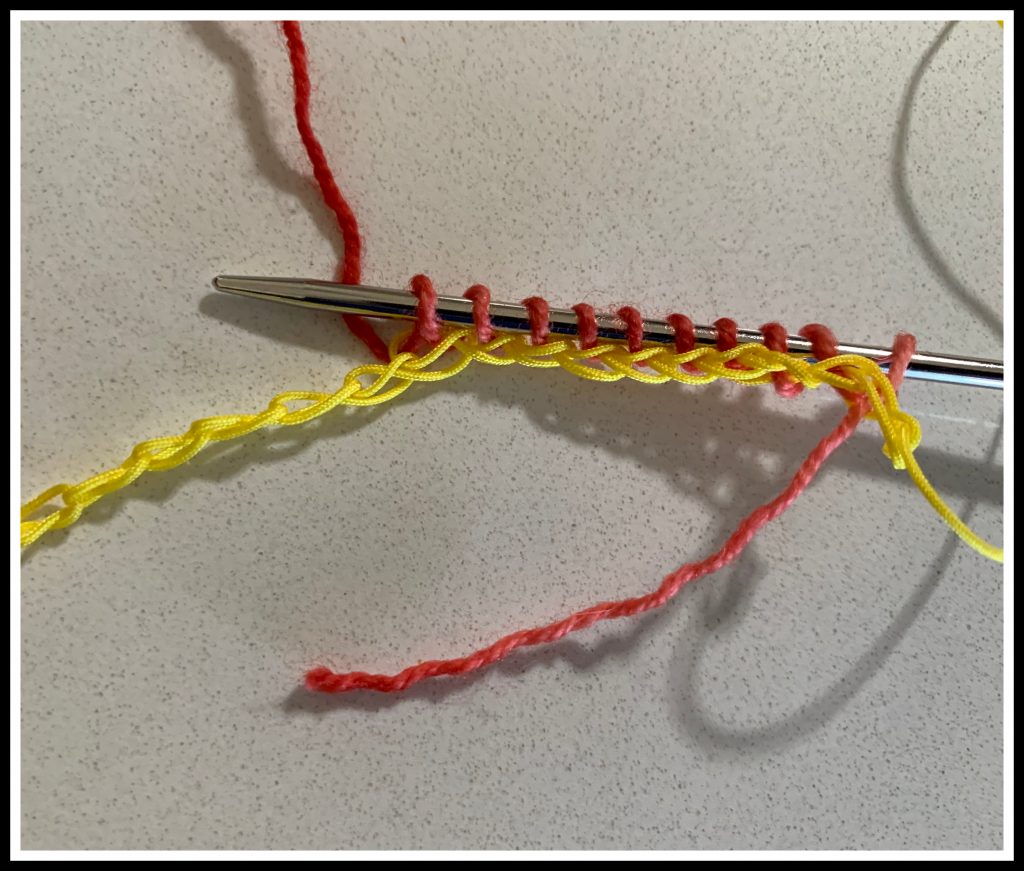
Once you have picked up all the provisional cast-on stitches you need, you can proceed with your project.
Step Four: When it’s time to release the cast-on stitches, run the needle through the first row of the project yarn right above the crochet chain. Be sure to use all left legs or all right legs of the stitches so you don’t drop any.
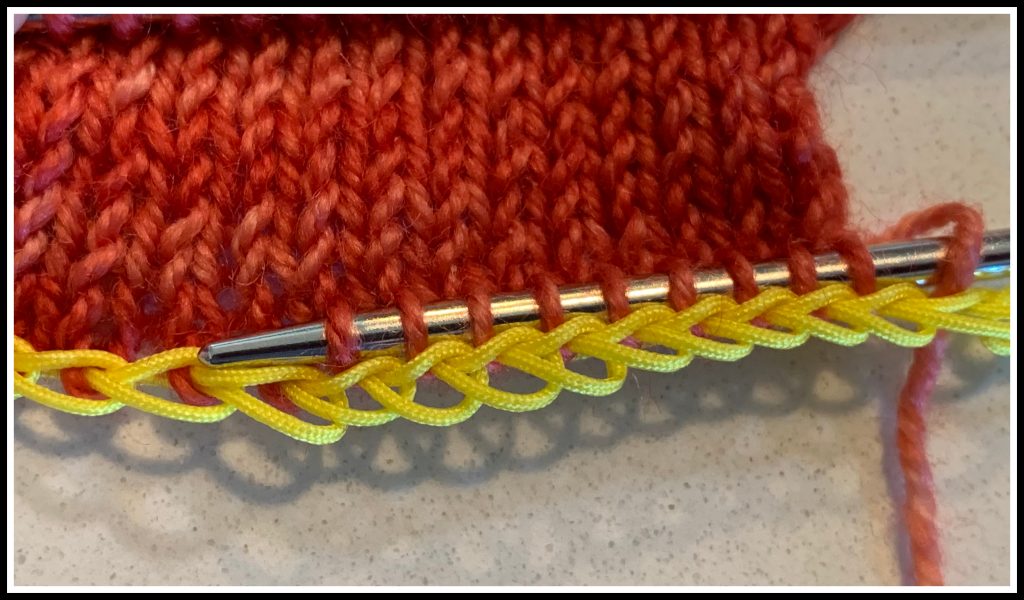
Step Five: Loosen up the last few crochet chains, and pull the tail back out of the last stitch. Another advantage of ravel cord is that the chains are slippery and easy to loosen up. Once the tail is free from the end of the chain, pull on the tail, and the chain should come right out.* If you prefer, you can pull the ravel cord out a little at a time and transfer the stitches to a needle one by one.
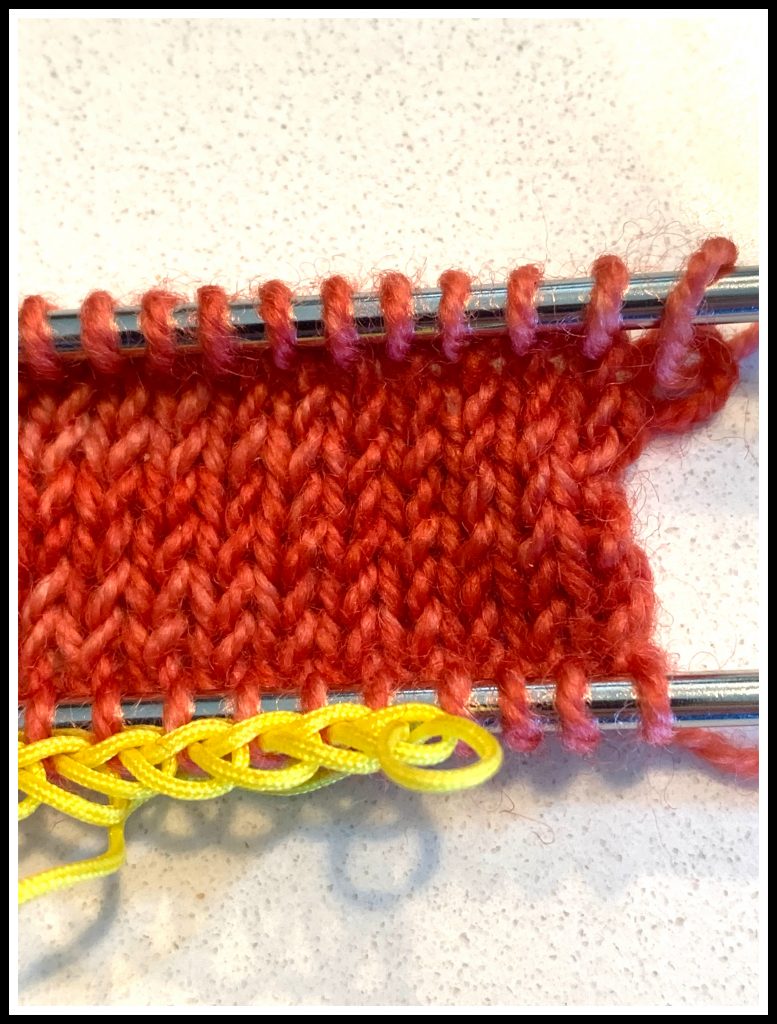
*If the ravel cord gets stuck when releasing the chain, it could be that the wrong loop was picked up. In this case, you may need to pull out a few loops of the ravel cord one by one. If you have a large bobbin or yarn butterfly attached, you may need to go to the other end of the chain and pick out the loops from that end. It’s slower from that end, and you may need to use an extra needle to temporarily hold the stitches, but the slipperiness of the ravel cord makes this process less painful.
As with the waste yarn cast on, you will have half stitches at each edge that will fall out when you release the chain. Simply add one e-loop stitch to replace them.
Lifelines
Ravel cord is also great for lifelines in complex stitch patterns. Arenda Holladay has a wonderful video on this topic called “Life Lines in Knitting”. Ravel cord IS slippery, so I knot the ends together to secure them until I want to move my lifeline.
Note that if you are using automatic life lines (see my Summer 2021 Needle Tip for automatic lifelines), nylon or rayon ravel cord may be a little too thick for some needles.
Rust-Free Lace Blocking
Ravel cord can also be useful for blocking lace. For example, if you have a lace shawl with points at the edges, but you are worried that your pins might rust, you can thread a ravel cord through the points and just pin the ends of the cord or pin the cord between the points. You don’t have to worry about the ravel cord having stretch of its own, and any rust will be on the ravel cord, not on your beautiful shawl.
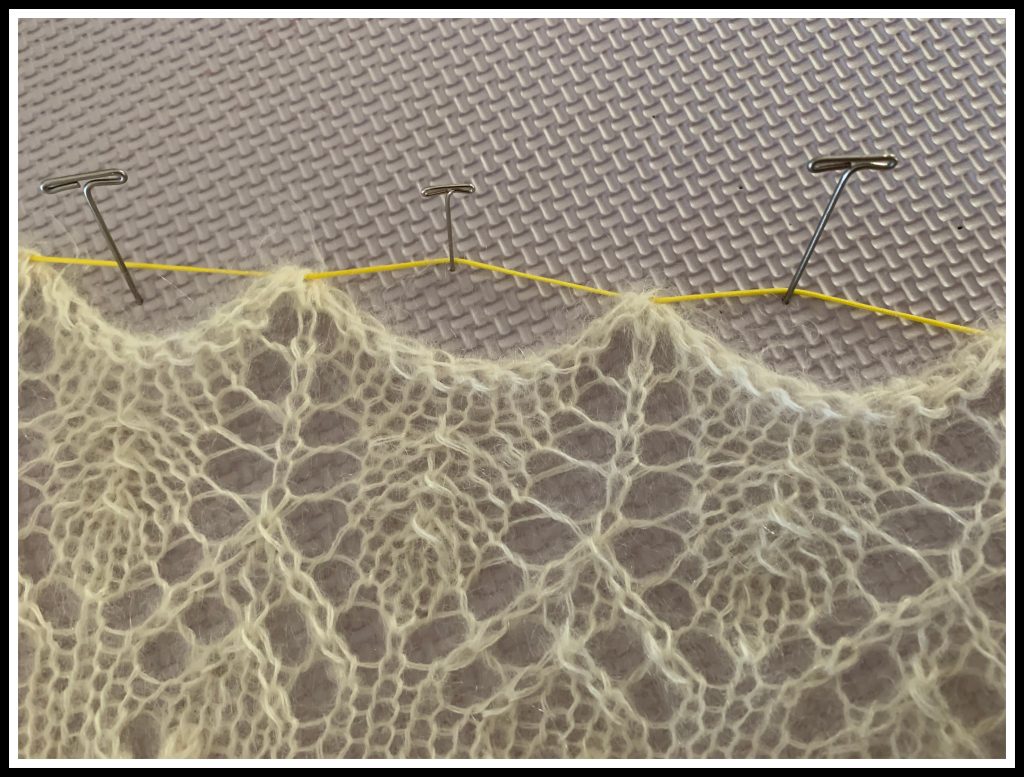
Tip: Get some ravel cord from your local yarn store or online, and use it for provisional cast ons, life lines, blocking, and more.
Copyright 2022, The Knitting Guild Association, Cast On Fall 2022, All Rights Reserved

0 Comment