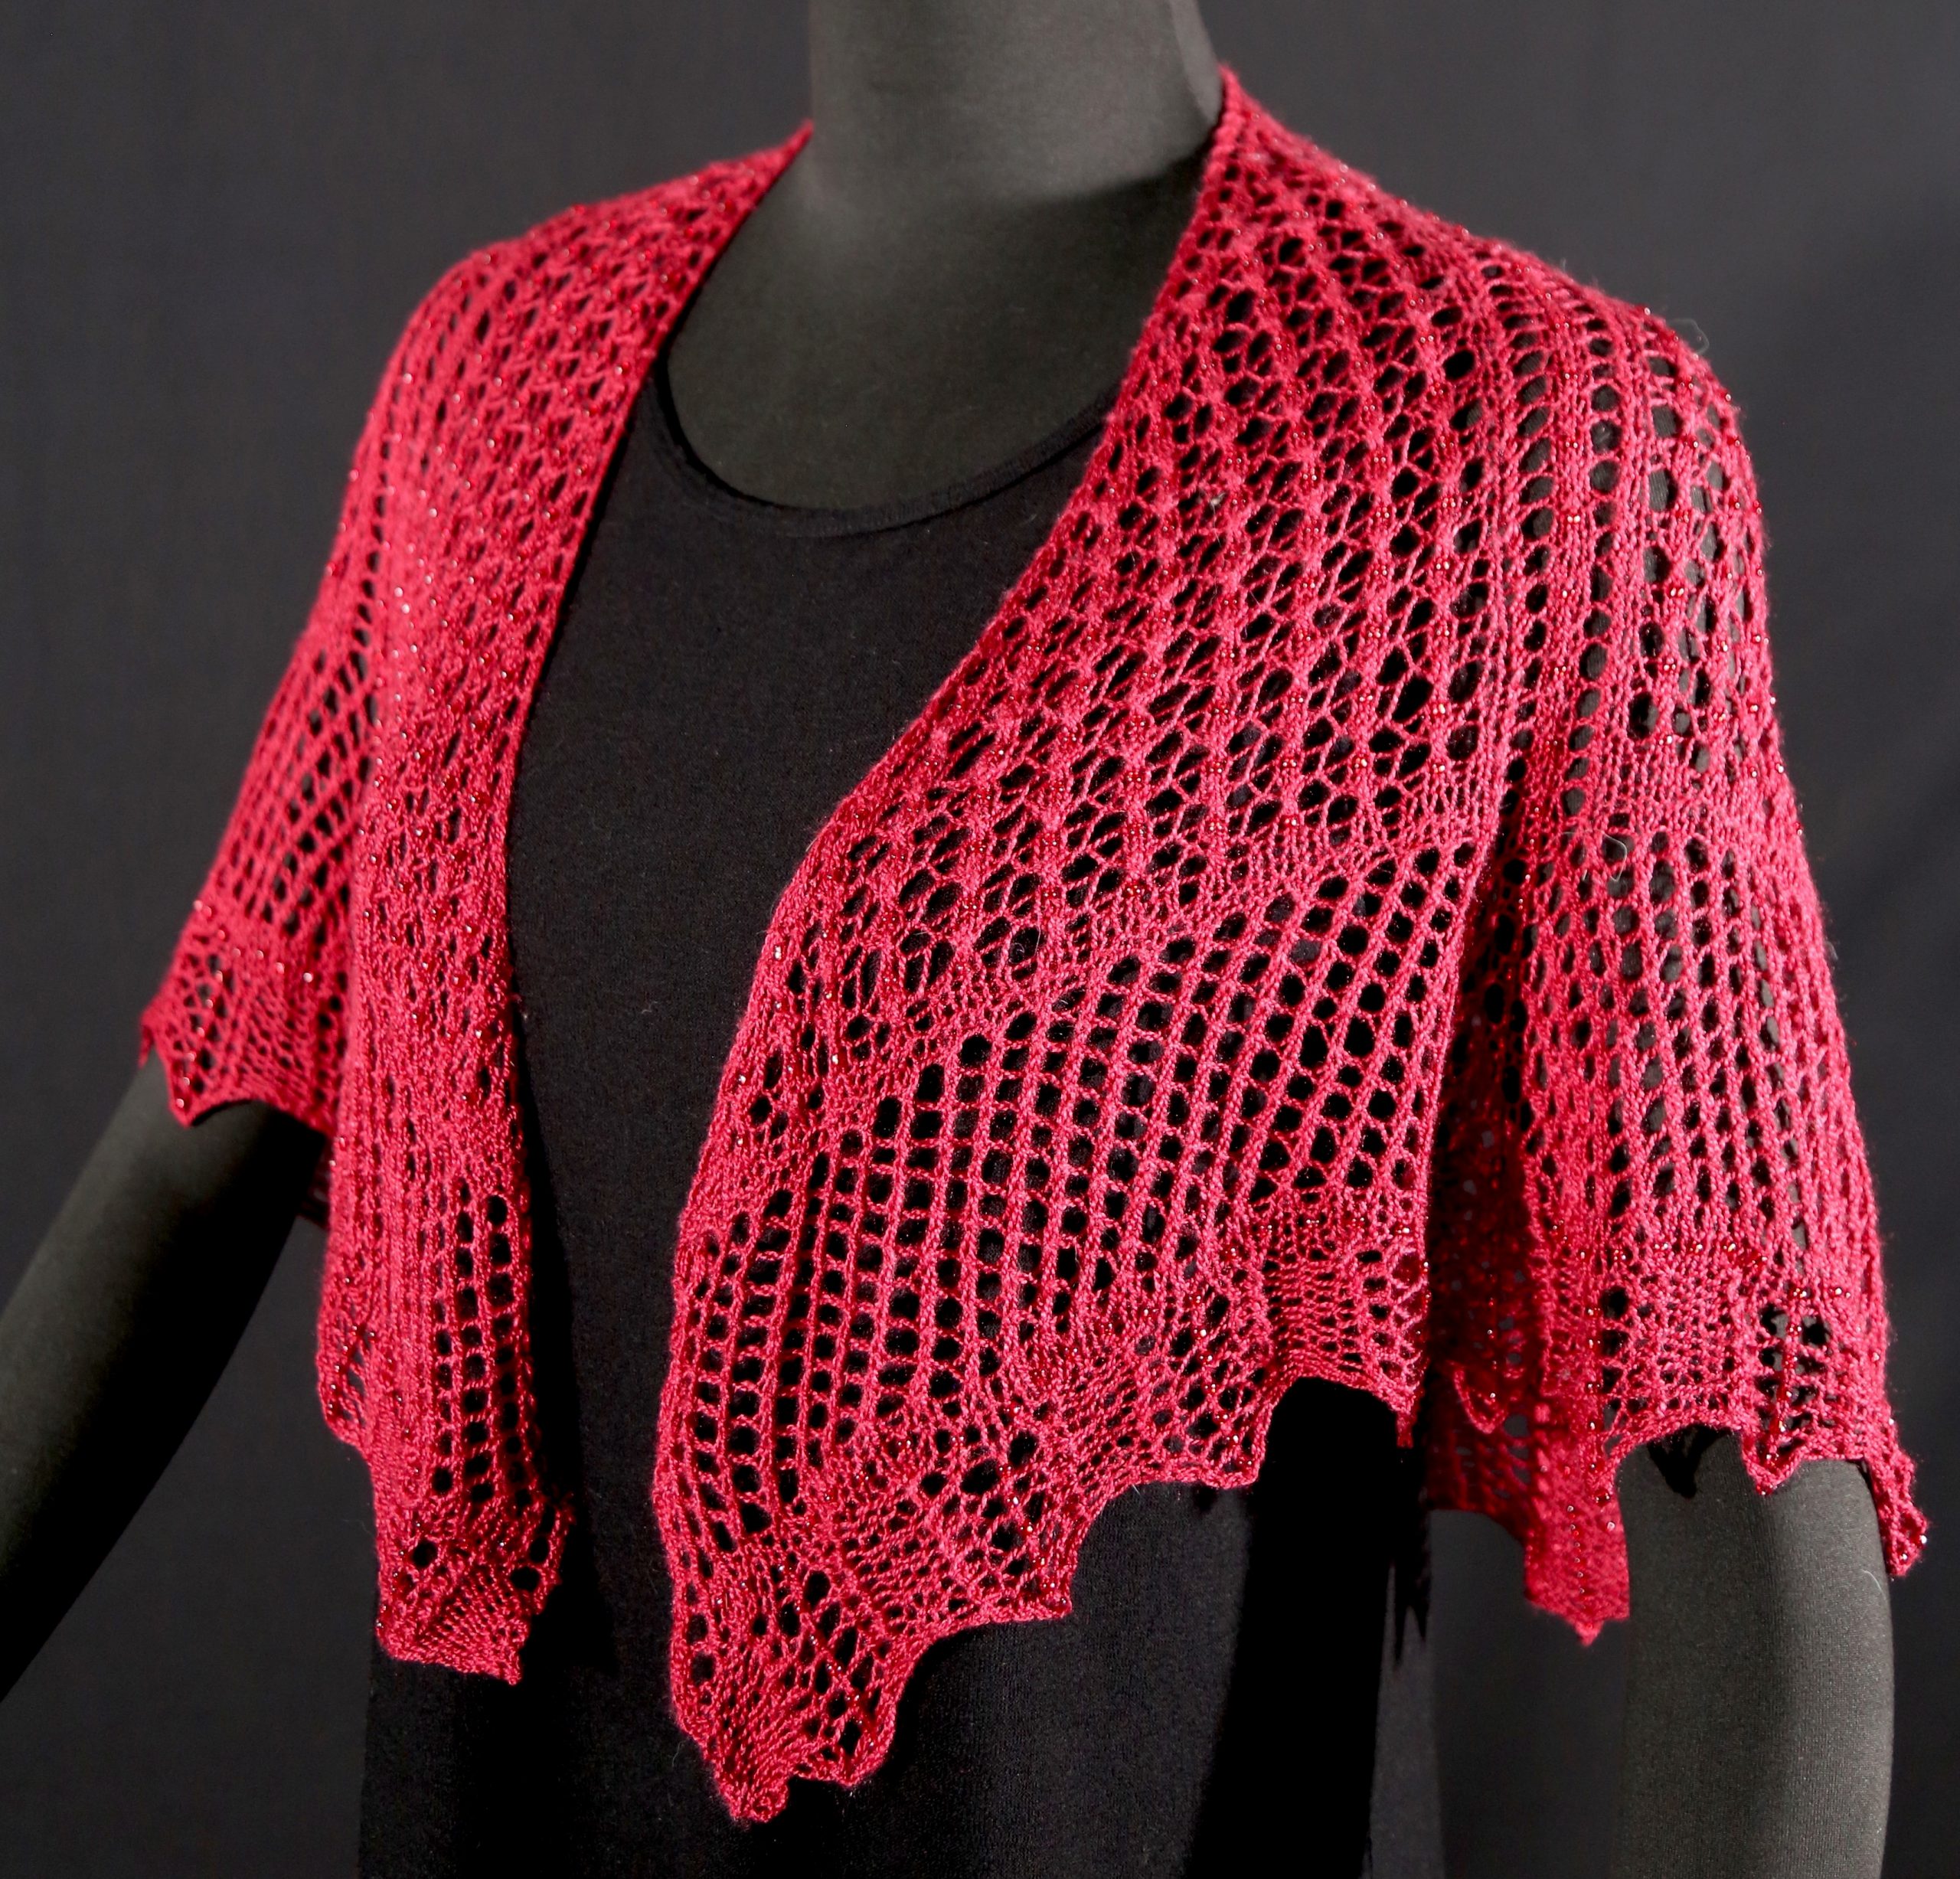
Crimson Rose by Leslie Gonzalez*

 Beyond the Pattern
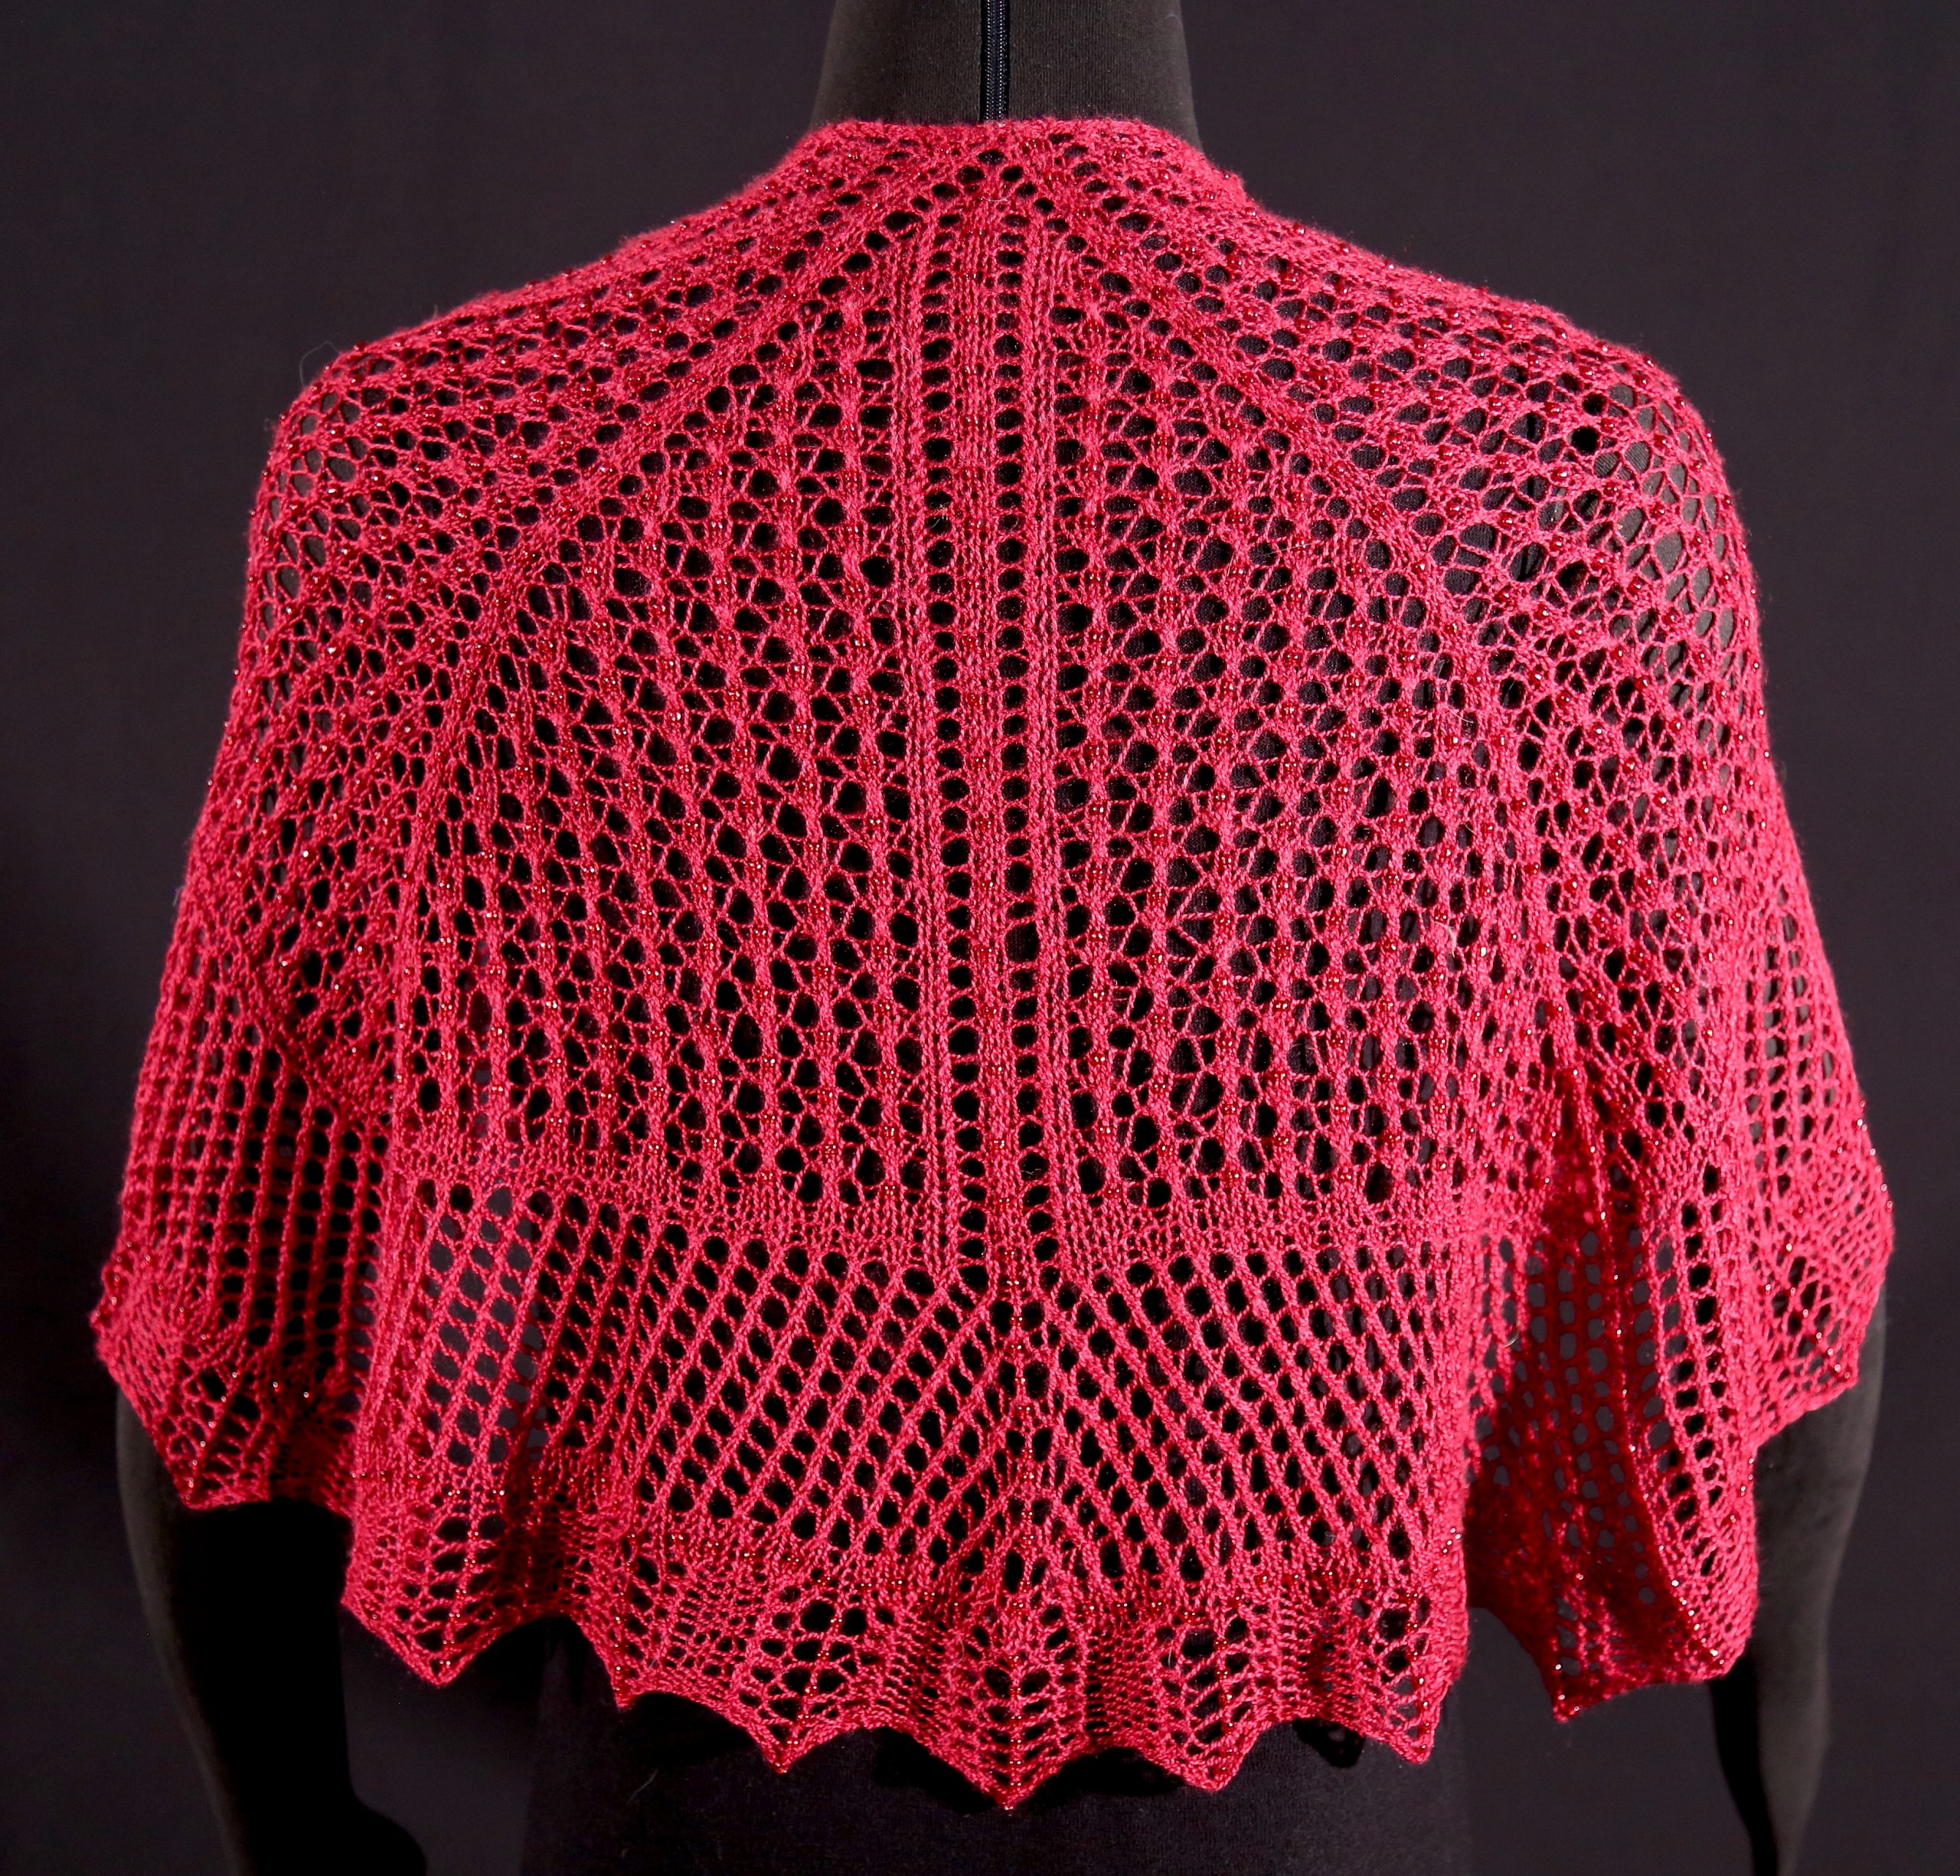
I designed this shawlette during the start of the 2020 pandemic as a way to keep busy and focused on something positive. If you are up for a challenge, this is a great pattern for you. The shawlette is heavily laced and uses many beads. For information on how to place beads in knitting, refer to Nancy Simet’s Learn Something New article on adding beads to your knitting.
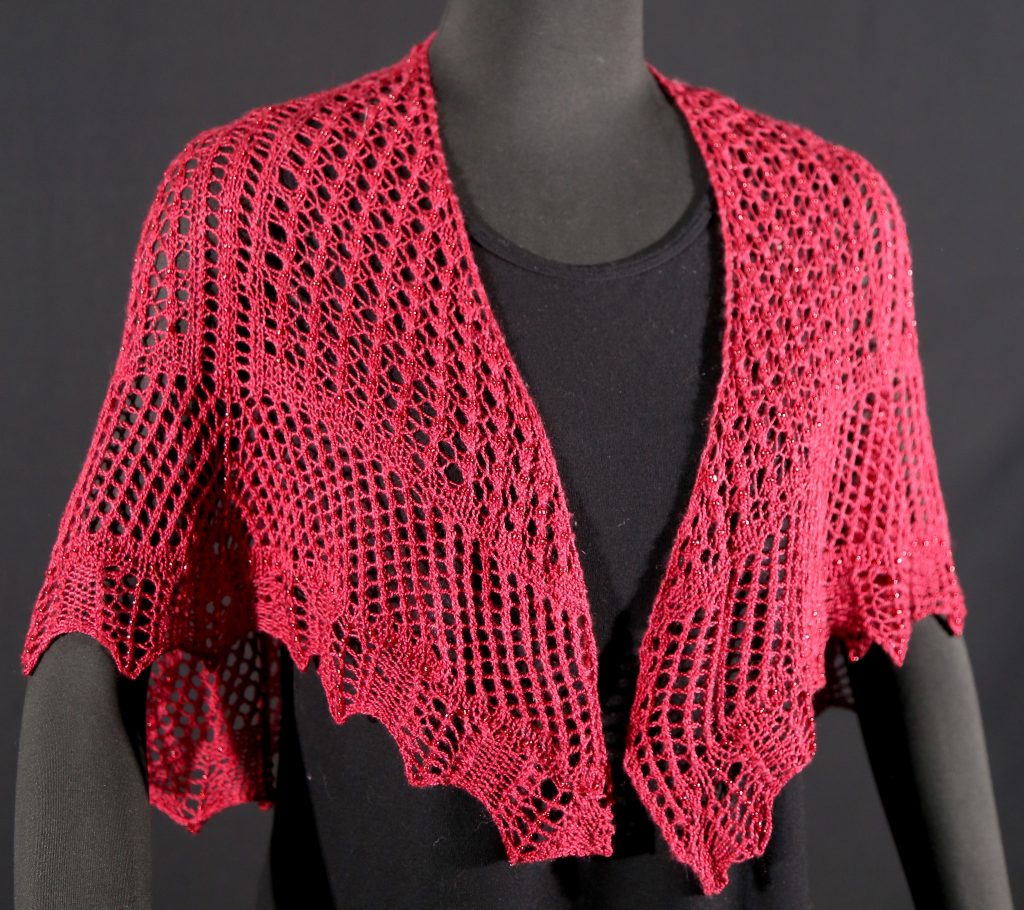
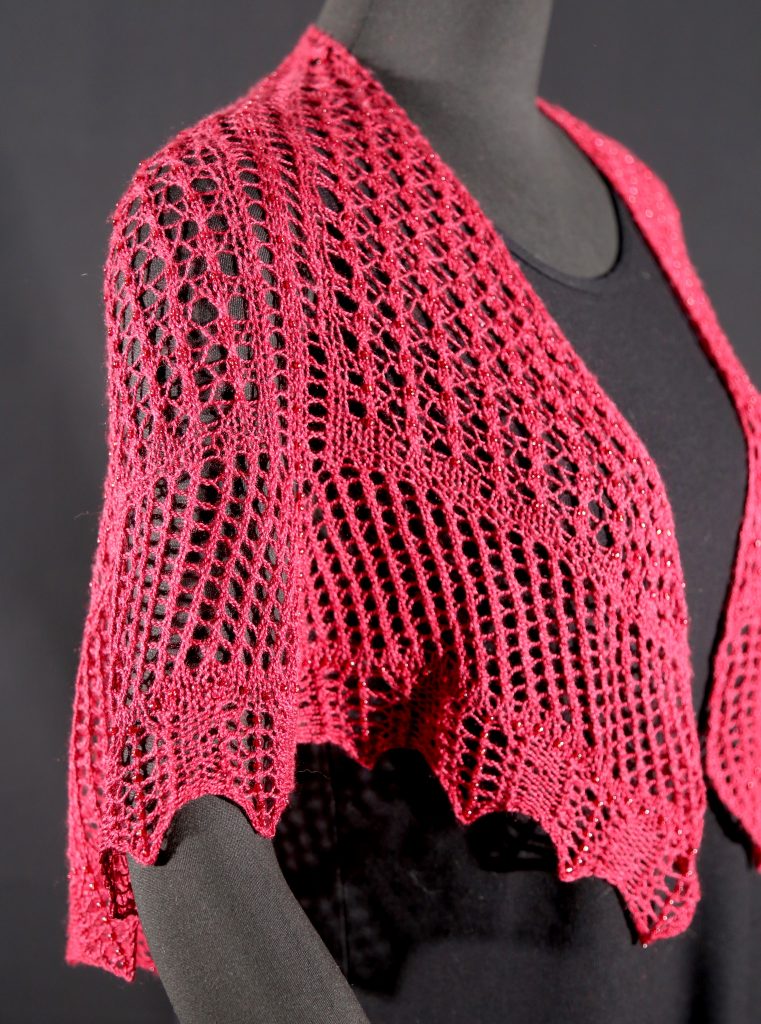
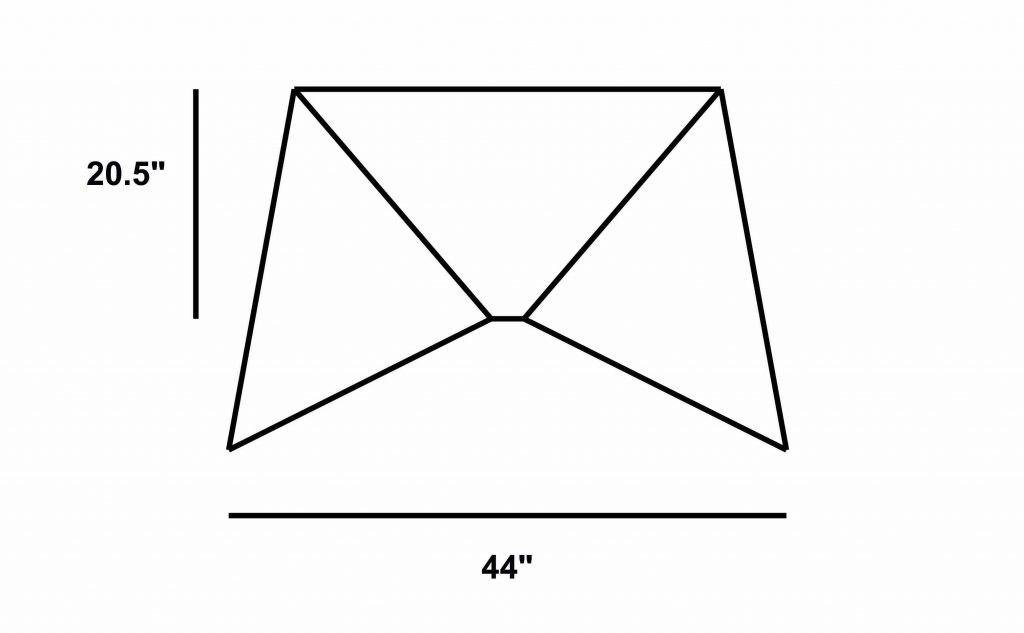
The shawl is worked in three wedges, separated by the typical triangular increases which are made on either side of a spine. Each spine is 3 stitches wide and embellished with beads. Each triangle is then divided in half by a pseudo-spine. The initial beadwork and pattern are mirrored within each triangle over these pseudo-spines. Once the first lace pattern is complete, the spines creating the shawl continue and all but the center pseudo-spine are no longer worked. The second pattern is mirrored over the remains of the pseudo-spines to mirror the lattice lace within each wedge. At the end, a beaded border is worked.
The shawl is heavily beaded which changes the drape of the typical shawls you may be used to knitting. Beads add so much elegance to the work. They seem daunting to use at first, but once you get the hang of beading, you may find you just can’t stop!
Finished Measurements
Width: 44” around the neck
Length: 20.5” down center back.
Materials
Juniper Moon Farm FINDLEY (798yds/726m, 100g/3.5oz, 50% Wool, 50% Silk): 1 skein #16 Garnet
Size 4 (3.5mm) 48” (120cm) circular needles or size needed to obtain gauge
1076 Toho Round Seed Beads 6/0 Transparent Silver Lined Dark Garnet #25D
Crochet hook size13/14 (.9mm) or size needed to fit beads
10 Stitch markers, optional
Tapestry needle
TECHNICAL TIP—Always buy extra beads. Every now and then there will be an odd bead. Some beads may have blemishes or have holes that are too small. Beads also tend to get lost and dropped.
DESIGNER NOTE—The shawlette can be worked without beads. Where the pattern states to place a bead, substitute knit 1 for the stitch. Be aware that beads change the drape of the fabric and omitting them will affect the final drape.
Gauge
Over Lozenge Pattern, Chart B, 14 sts & 22 rows = 4”/10cm. To save time, take time to check gauge.
TECHNICAL TIP—To work a gauge swatch for this shawl, CO 22 sts. K2 sts then repeat sts 9–14 on Chart B three times, k2. Work until you have at least 4 inches. Block the swatch and then measure the center 18 sts. Divide the stitches/rows by the width/height. Then multiply by 4 to get gauge in sts/rows per 4”.
Abbreviations
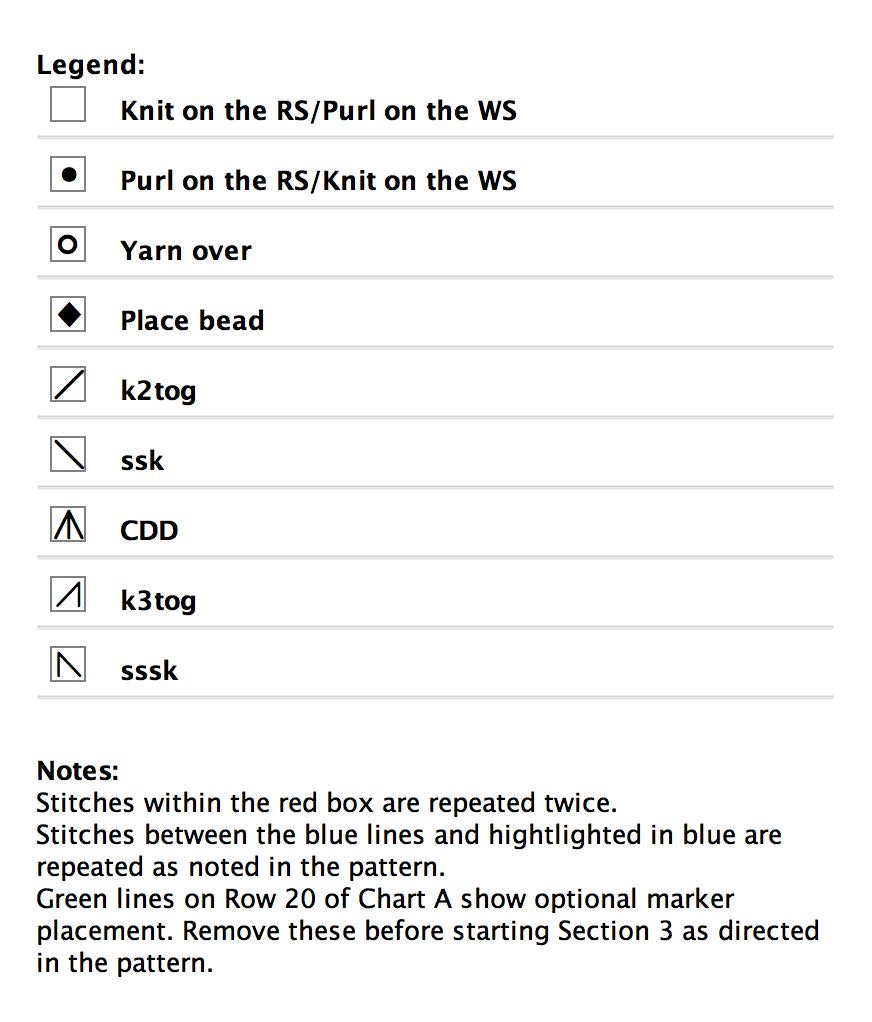
CDD—Central Double Decrease: Sl 2 sts at the same time as if to k2tog, k1, pass the slipped sts over the knit st.
Sssk—Slip, slip, slip, knit: Sl 1 st as if to knit. Replace this stitch in its new orientation on LH needle and knit 3 sts tbl.
PB—Place bead: Place a bead on the crochet hook, grab the st with the crochet hook. Sl the bead on to the st and place the st back on the left needle. Knit the st.
Shawl Beginning/Cast On
Work a Garter Tab start: CO 3 sts. Knit 9 rows. Pick up and knit 4 sts along the side of the garter tab. Then pick up 3 sts along cast-on edge—10 sts.
DESIGNER NOTE—Work the first and last 2 stitches of every row in garter stitch by beginning and ending every row with k2. These edges are included in all written directions and on the charts.
Section 1/Setup
Setup Row 1 (WS): K2, (k1, p1, k1) twice, k2.
Setup Row 2 (RS): K2, (yo, k1, PB, k1) twice, yo, k2—13 sts.
Setup Row 3 (WS): K2, (p1, pm, k1, p1, k1, pm) twice, p1, k2.
DESIGNER NOTE—Placing markers around both spines will help you keep your place. On Row 2, place a marker between stitches 3 and 4 and 6 and 7 as directed in Setup Row 3 above: one spine marked. Next place a marker between stitches 7 and 8 and 10 and 11: second spine marked. The shawl will widen between the spines and the edges. These markers set off the two spines of the shawl.
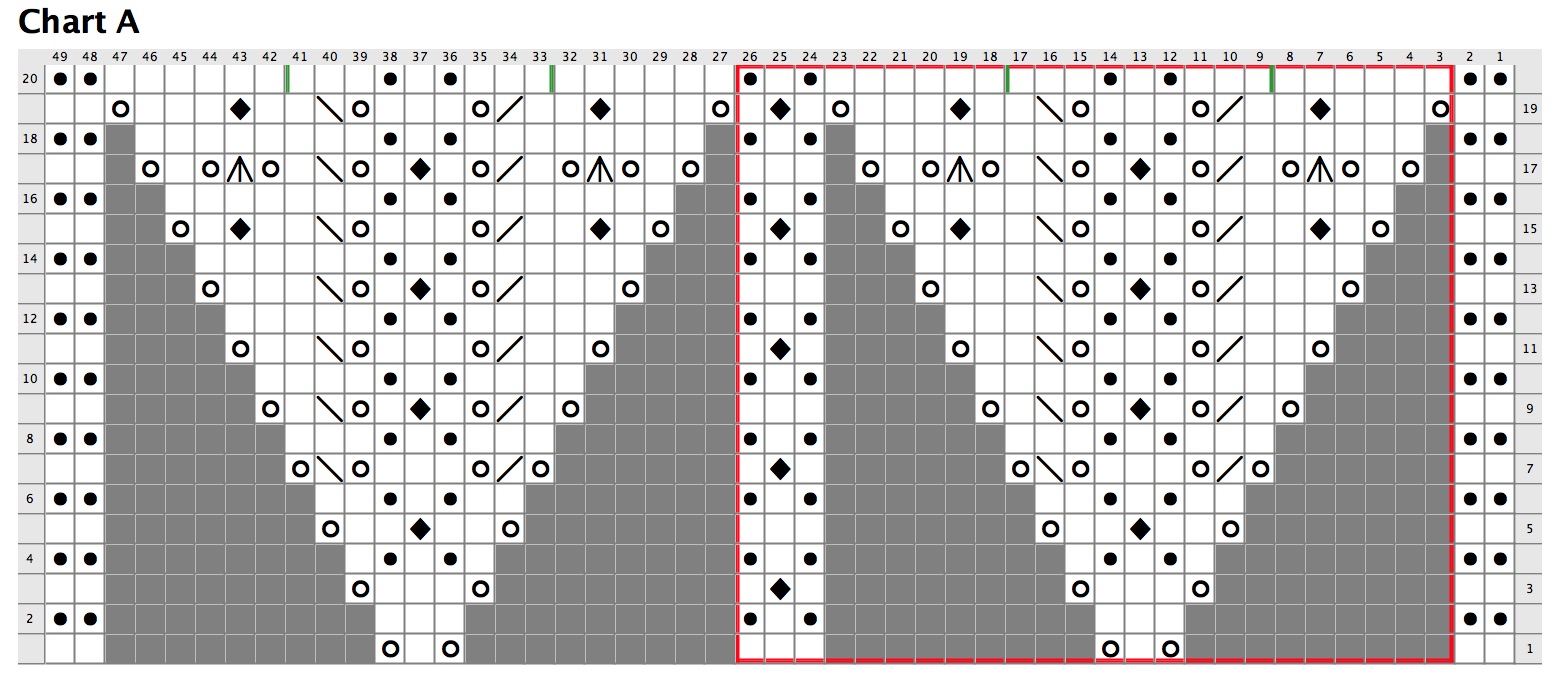
Work Rows 1–20 of Chart A—73 sts.
TECHNICAL TIPS—Reading the charts: the charts show both RS and WS rows. The layout of this shawl is: two-st edging, first wedge, three-st spine, second wedge, 3-st spine, third wedge, two-st edging.
There are two spines creating three wedges. Increases are made on every RS row by making a yarn over after the first edge and before the final edge, and before and after each spine. On every RS row you will add a total of 6 sts.
Chart A sets up 9 sts that will run down the center of each wedge. The green lines on Row 20 of Chart A show where to place optional markers to mark these 9 center sts on each wedge. Marking these stitches will help you keep your place for the first section.
On the charts, the red box delineates the wedges. You will always work the sts within the box two times. On RS rows the remaining sts are worked after you’ve worked the sts in the red box twice; they are for the final wedge and show how to end that wedge. On WS rows, work these same sts one time before working the sts in the red box twice.
After working Chart A, sts within each red box will be repeated as well. Those are shown in blue. The directions below will state how many times to repeat the sts shown in blue within each section.
RS rows are read right to left and WS rows are read left to right.
Section 2/Lozenge Pattern
Work Rows 1–12 of Chart B as follows:
RS rows: K2 edge sts, *work sts inside red box twice, then work remaining sts, end k2.
WS rows: K2, work to red box, repeating sts inside red box twice, end k2.
For these first 12 rows: Rep the sts between the blue lines once—109 sts after Row 12.
Rep Rows 1–12 four more times.
You will rep the sts within the red box twice, as above, but you will now rep the sts between the blue lines also. Each time you rep the 12 rows of the chart you will add one rep of the sts between the blue lines on both sides of the center sts of each wedge as foll:
Rows 13–24: Rep the sts between the blue lines 2 times—145 sts.
Rows 25–36: Rep the sts between the blue lines 3 times—181 sts.
Rows 37–48: Rep the sts between the blue lines 4 times—217 sts.
Rows 49–60: Rep the sts between the blue lines 5 times—253 sts.
TECHNICAL TIP—Every 12 rows adds 36 sts to the shawlette.
If you placed markers on Row 20 of Chart A to mark the center 9 sts of each wedge, remove them after completing Section 2.
Section 3/Netting
Work Rows 1–4 of Chart C once, repeating the sts between the blue lines 17 times—253 sts.
No sts are added to the shawl for these 4 rows.
Work Rows 1–4 of Chart D five times, repeating the sts between the blue lines as foll:
Rows 1–4: Nineteen times—265 sts.
Rows 5–8: Twenty times—277 sts.
Rows 9–12: Twenty-one times—289 sts.
Rows 13–16: Twenty-two times—301sts.
Rows 17–20: Twenty-three times—313 sts.
TECHNICAL TIP—Every 4 rows adds 12 stitches to the shawlette. At the end of this section, each wedge will have 101 sts.
 Section 4/Edging
Work Rows 1–4 of Chart E to set up for edging, repeating the sts within the blue lines 22 times—313 sts.
At this point, no sts are added to the shawl and the st count will remain at 313 throughout the edging.
Next, work Rows 1–2 of Chart F, repeating the sts in blue 9 times.
Rep Rows 1–2 four more times.
Then work Row 1 again, ending ready to work a WS row.
To bind off, k2, *place these 2 sts back on the left needle and knit them tog tbl, k1; rep from * until 1 st rem.
Cut, leaving a 6” tail and pull through rem st.
Finishing
Weave in ends and block.


Copyright 2021, The Knitting Guild Association, Cast On Winter 2020-2021, All Rights Reserved
Rev. 12/02/21

0 Comment